Winter can be brutal on your vehicle, especially when it comes to road salt. While salt helps to melt ice and snow on roads, it can wreak havoc on your car’s undercarriage if left unchecked. Rust and corrosion are common results of prolonged exposure to salt, leading to costly repairs. To protect your vehicle and prolong its lifespan, it's essential to remove winter road salt from your car’s undercarriage regularly. In this guide, we'll walk you through the steps to effectively clean your car’s underbody and keep it in top shape.
Understanding the Dangers of Road Salt
Winter road salt is a necessary evil for drivers in snowy climates. Unfortunately, while it makes roads safer, it poses a significant threat to your vehicle's metal components. Salt is highly corrosive, and when it comes into contact with your car’s undercarriage, it can start to erode the metal, leading to rust formation. This process can begin within a matter of weeks, especially if moisture is present, accelerating the corrosion process. If left untreated, this can damage your car's frame, brake lines, exhaust system, and other critical components, leading to safety concerns and expensive repairs.
Given these risks, regular cleaning is crucial, especially after winter storms when salt accumulates the most. The key to protecting your vehicle from salt damage is to address the issue promptly and thoroughly.
When and How Often Should You Clean?
Timing is everything when it comes to preventing salt damage. Ideally, you should clean your car's undercarriage after every major snowfall or whenever you notice significant salt buildup. However, the frequency of cleaning also depends on your location and driving habits. For example, if you live in a region with heavy snowfall and use salt-treated roads frequently, cleaning every two weeks during winter might be necessary.
Another important factor is temperature. Cleaning your car during milder winter days when the temperature is above freezing ensures that the water used won’t freeze on your vehicle, potentially causing additional problems.
Step 1: Gather the Right Tools and Materials
Before starting the cleaning process, make sure you have the necessary tools and materials. Here’s what you’ll need:
- High-pressure hose or pressure washer
- Jack stands or ramps
- Degreaser or salt remover solution
- Bucket and car wash soap
- Soft brush or microfiber cloths
- Safety gear (gloves, goggles)
Having the right equipment will make the process more efficient and thorough. Using a pressure washer, in particular, helps to blast away stubborn salt deposits that can cling to the underside of your car.
Step 2: Prepare Your Car for Cleaning
The first step in cleaning your undercarriage is to prepare your car properly. This involves raising your vehicle safely to gain better access to the underbody. You can use jack stands or ramps to elevate your car. If you’re using ramps, ensure they are placed on a flat, stable surface and that the car is securely parked.
Once your car is raised, take a moment to inspect the undercarriage for any visible damage or corrosion. Pay close attention to areas around the wheel wells, brake lines, and exhaust system. If you notice any severe rust, you may need to consult a professional before proceeding with cleaning.
Step 3: Start with a High-Pressure Rinse
The first actual cleaning step is to give your undercarriage a thorough rinse using a high-pressure hose or pressure washer. This step is crucial for dislodging loose dirt, salt, and debris that may have accumulated during your winter drives. Make sure to spray in all directions, focusing on hard-to-reach areas where salt can easily accumulate.
When using a pressure washer, be mindful of the pressure setting. While high pressure is effective, excessive force can potentially damage delicate parts of your car’s underbody. Aim to strike a balance that removes debris without causing harm.
Step 4: Apply a Salt Remover Solution
Once the initial rinse is complete, it's time to apply a salt remover solution or degreaser. These products are specifically formulated to neutralize the corrosive effects of salt and remove stubborn residues. You can purchase salt removers from most auto supply stores or even online.

Spray the solution generously over the undercarriage, making sure to cover all areas where salt is likely to accumulate. Allow the solution to sit for a few minutes to break down the salt deposits. During this time, the chemicals will neutralize the salt, making it easier to rinse away in the next step.
Step 5: Scrub the Undercarriage
After letting the salt remover solution work its magic, it’s time to scrub the undercarriage to remove any remaining salt and grime. Using a soft brush or microfiber cloth, gently scrub the metal surfaces, focusing on areas where salt tends to stick, such as around the wheel wells and suspension components.
Be thorough but gentle to avoid damaging sensitive parts. Scrubbing helps to remove any salt remnants that might not have come off during the initial rinse, ensuring a more complete clean.
Step 6: Rinse and Dry
Once you’ve finished scrubbing, it’s time to rinse off the salt remover and any remaining dirt. Use your pressure washer or high-pressure hose again to thoroughly rinse the undercarriage. Make sure all cleaning agents are washed away, as leaving residue behind can contribute to further corrosion.
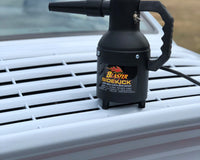
After rinsing, it’s important to dry your undercarriage as much as possible. While this step can be tricky, especially during winter, you can use an air compressor or blower to remove excess water from crevices and joints. Drying prevents any remaining moisture from freezing or contributing to rust.
Step 7: Apply Rust Prevention Coating
To add an extra layer of protection, consider applying a rust prevention coating to your car’s undercarriage. There are various sprays and coatings available that can help seal the metal and protect it from future exposure to salt and moisture. These products create a barrier that reduces the likelihood of rust forming, providing long-term protection for your vehicle.
This step is especially useful for older vehicles or those that see frequent use on salted roads. Applying a rust prevention coating after every major cleaning can significantly extend the life of your car’s undercarriage.
Step 8: Routine Maintenance for Long-Term Protection
While one thorough cleaning can remove the salt that has already built up, routine maintenance is key to long-term protection. During winter, try to clean your car’s undercarriage at least once a month or after heavy snowstorms. If you live in a region with particularly harsh winters, more frequent cleanings may be necessary.
Additionally, keeping an eye on your car’s undercarriage throughout the year and addressing any signs of rust immediately can save you from expensive repairs down the line. Regular maintenance goes a long way in preserving your vehicle’s value and ensuring it remains safe on the road.
Conclusion
Winter road salt can be a silent but serious threat to your car’s undercarriage, leading to rust, corrosion, and costly repairs if not addressed properly. By following this step-by-step guide, you can effectively remove salt buildup and protect your vehicle from the harsh effects of winter driving. Regular cleaning, combined with the use of salt removers and rust prevention coatings, can significantly prolong the life of your car’s underbody, keeping it in top condition for years to come. Don’t let winter salt take its toll—take action today and keep your car running smoothly through the seasons.


